Add Row
Add Element
cropper
update
Pearl City Local
update
Add Element
  • Home
  • Events
  • Deals & Promos
  • Directory
  • Categories
    • Featured
    • Business Spotlight
    • Local News
    • Wellness
    • Health
    • Lifestyle
    • Home & Garden
    • Travel
    • Pets
    • Food
  • Restaurants
August 21.2025
3 Minutes Read

Unlock Your Garden's Potential: How to Prune a Tree for Optimal Growth

Electric pruning saw trimming tree branches, demonstrating how to prune a tree.

Mastering Tree Pruning: A Guide for Pearl City Residents

For the homeowners of Pearl City eager to enhance their gardens, tree pruning is an essential skill that not only beautifies their outdoor space but also contributes to the health and longevity of trees. This guide provides simple but effective pruning techniques, tools, and the right timing to ensure optimal growth.

The Importance of Proper Timing in Tree Pruning

Understanding when to prune your trees is key to fostering their health. The best time for pruning largely depends on the type of tree. In general, winter months are ideal for larger trims as it minimizes the risk of bugs and diseases spreading through open wounds. Conversely, spring and summer pruning can be advantageous for improving shape and boosting growth as trees enter their active growth phase. For homeowners who may lack the experience, getting the timing right is crucial; incorrect pruning can lead to damage or stunted growth.

Must-Have Pruning Tools for Every Home Gardener

Equipping yourself with the right tools is half the battle won in tree pruning. Consider investing in:

  • Pruning Shears: Perfect for small branches up to 3/4-in thick.
  • Loppers: These tools can assist in cutting branches up to 2-1/2-in thick.
  • Pruning Saw: Ideal for larger branches that span from 1-1/2 to 5 inches.
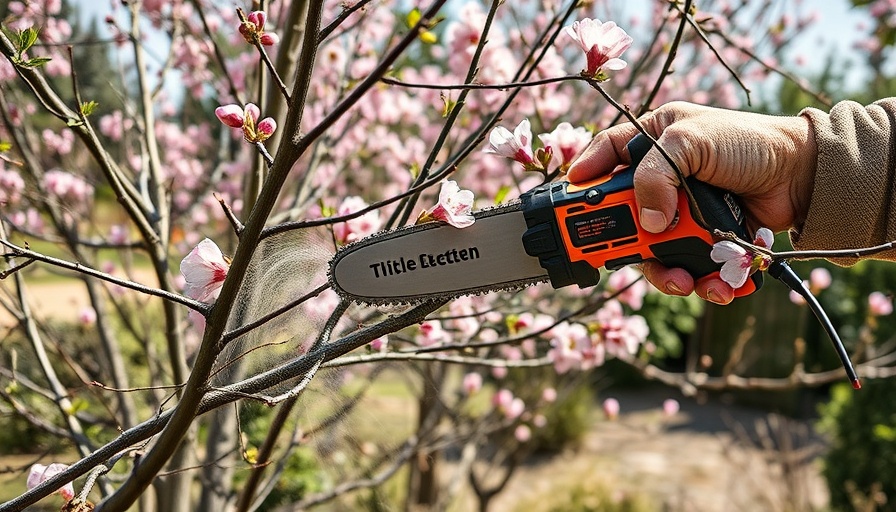
  • Battery-operated Pruning Shears: These are especially useful for reaching difficult spots and can tackle branches of up to 1-1/2 inches.
  • Long Pole Pruner: Designed for those high branches without the need for a ladder.

Besides tools, ensure you’re outfitted with safety glasses and gloves to protect yourself during the pruning process.

Essential Safety Considerations for Pruning

While tree pruning can be a rewarding experience, it also comes with safety risks. Beginners should avoid precarious ladder work, especially with larger trees. If a tree's height demands ladder usage, hiring a professional can reduce the risk of injury. Additionally, using a buddy system while pruning can help by providing assistance and an extra set of eyes, which can be critical if unforeseen issues occur.

Visualizing Your Tree's Structure

Recognizing the main trunk and the tree's overall structure is essential. The trunk serves as the tree's lifeblood, carrying nutrients and water necessary for growth. When pruning, it’s critical to avoid removing more than 25% of the trunk. Begin pruning from the bottom and progress upward to maintain proper shape and structure.

Benefits of Pruning: More Than Just Aesthetic

Aside from enhancing beauty, regular pruning leads to several other benefits: trees become less susceptible to disease, experience improved air circulation, and have better exposure to sunlight. This not only allows for healthy growth but also maintains a safer environment, as dead or diseased branches can become hazards during storms.

Common Misconceptions About Tree Pruning

Many homeowners believe that pruning primarily seeks to cut back branches aggressively; in reality, proper pruning encourages growth and longevity. Others worry that any cut might harm the tree, often leading them to avoid necessary maintenance altogether. Understanding the techniques and timing can help dispel these myths, allowing for healthier gardening practices.

Final Thoughts: Your Gardening Journey Awaits

Armed with this guide, residents of Pearl City can embark on their tree care journey with confidence. Implementing the right pruning techniques not only fosters the well-being of your trees but also enhances your outdoor living space. Consider exploring your local gardening shops for tools and resources that cater to beginners. Making the effort now will reap dividends in a beautiful, healthy garden for years to come.

For more tips on improving your home and garden, explore local workshops or connect with fellow gardening enthusiasts in your community.

Home & Garden

0 Comments

Write A Comment

*
*
Please complete the captcha to submit your comment.
Related Posts All Posts

Transform Your Space with Essential Tiling Tools for Pearl City DIYers

Update Essential Tiling Tools for Pearl City DIYers If you're a Pearl City resident looking to take on a tiling project, you're in for a rewarding experience! With the right tools and a bit of patience, you can transform your space. Here’s a comprehensive rundown of essential tiling tools that every DIYer should consider, along with professional tips to ensure success. Why the Right Tools Matter Having the right tools makes all the difference when you're tackling a DIY tiling project. Not only can the right tools save you time, they also enhance the quality of your work. From cutting tiles to ensuring proper spacing, each tool has a specific purpose that contributes to a polished final result. According to experts, good quality tools not only ease the workload but elevate the overall finish, making your project worthy of professional applause. The Must-Have Tiling Tools When it comes to tiling, several tools stand out as essential. Here’s a curated list of tools recommended by professionals, with insights from experienced contractors: Wet Saw: This is critical for making precise cuts, especially for larger tiles. Prices range from $100 to over $1,000 based on size and functionality. Manual Tile Cutter: Ideal for simple tasks, it’s fast and mess-free for straight cuts. Rubi models are highly recommended for their durability. Angle Grinder with Turbo Diamond Blade: Perfect for notching and intricate cuts, a variable-speed grinder can help achieve clean finishes. Trowels: Necessary for spreading adhesive uniformly, having trowels in various sizes will help you get the right adhesive thickness. Spacers: These ensure even spacing between tiles, a vital aspect for achieving aesthetically pleasing results. Grout Float: A specialized tool for filling grout joints, key to a smooth, professional finish. Level: Check your angles and ensure everything is straight, helping you avoid costly mistakes. Tape Measure: A basic yet indispensable tool for any tiling job to measure out your spaces accurately. Expert Tips for Tiling Success Once you have your tools, following professional advice can make your tiling project run smoothly: Start Small: If you're a first-timer, begin with a small project to build your confidence and skills. Take Your Time: Rushing can lead to mistakes. Ensure you check measurements twice and stay focused. Watch Instructional Videos: Familiarize yourself with each tool and process before diving in. Visual aids can clarify complex steps. Stay Safe: Don’t forget personal protective equipment—gloves, goggles, and masks are vital. They're not just accessories; they keep you safe and comfortable. The Value of Preparation Proper preparation is key to a successful tiling job. Before you even begin laying tiles, ensure you have adequately cleaned and primed the surface. Dust can ruin your adhesive bond, so clean as you go! The function of each tool increments the likelihood of achieving a smooth outcome. Tilers often recommend keeping a clean workspace and having all materials and tools ready before starting. Closing Thoughts: Take Action Ready to start your tiling journey? With the right tools and advice, you can undertake this DIY project with confidence. Whether you're sprucing up your kitchen or designing a new bath, the satisfaction of completing your tile project will be worth it. Don’t hesitate to check out local home improvement stores for these essential tools!

Conquer Dog Hair in Your Car: Proven Tips for Pet Owners

Update Effective Ways to Combat Dog Hair in Your Vehicle Living in Pearl City, where outdoor adventures with our pets are common, many dog owners know the struggle of keeping their cars hair-free. Whether it's a trip to the beach or a jaunt through the nearby parks, the furry companions we cherish often leave behind a trail of hair that can feel impossible to manage. But with the right approach and tools, getting dog hair out of a car can transform from a daunting task into a manageable routine. Why Does Dog Hair Stick So Well? Dog hair tends to cling to materials in cars due to static electricity and the type of fabric commonly used in vehicle interiors. The coarse carpet, prevalent in most vehicles, makes it difficult for vacuums to reach the hair embedded deep within. Understanding how dog hair interacts with your car's upholstery can help you tackle this problem effectively. Step-by-Step Dog Hair Removal Process Here’s a comprehensive method for reclaiming your ride from dog hair: Vacuum Thoroughly: Start with a powerful vacuum cleaner to remove the larger clumps of hair and debris. Make sure to get into those tough spots between the seats. Neutralize Static: To combat the static cling that makes hair stubbornly adhere to fabrics, mist your seats with a mild solution of water. This can loosen the hair, making subsequent removal easier. Use the Right Tools: Invest in a rubber pet hair removal tool or even a lint roller for those last bits of hair. The rubber texture tends to attract and lift hair more effectively than traditional brushes. Second Vacuuming: After you’ve scraped and gathered the hair, do a second round of vacuuming to ensure you pick up any remaining strands. Lint Roller Finish: For a final touch, use a lint roller to catch any errant hairs that may have escaped your earlier efforts. This systematic approach, outlined in detailed articles from trusted sources and proven by experience, enables car owners to maintain a clean and pleasant driving environment. Routine Maintenance to Minimize Dog Hair Build-up A consistent cleaning routine is essential. Cleaning your vehicle directly after trips with your dog can prevent hair from becoming embedded. Quick daily touch-ups with a vacuum or a rubber glove can go a long way in keeping your car looking its best. It's also wise to invest in pet seat covers, which will protect your upholstery and can easily be removed and washed. Grooming Your Dog for Less Shedding Regular grooming significantly reduces the amount of hair your dog sheds in the first place. Discuss with your veterinarian the best grooming routine for your pet's breed and consider grooming them shortly before you take them for a ride. The Emotional Connection of Pet Ownership Caring for a pet extends beyond physical maintenance; they become part of our families. The joys they bring—especially during family outings—outweigh the challenges presented by the occasional hairy vehicle. Embracing this bond means being proactive about maintaining a clean car while cherishing every moment spent with our furry partners. Cleaning pet hair doesn’t have to become a dreaded chore. By implementing successful strategies and regularly engaging in maintenance, you'll not only enjoy a clean car but also the adventures that come with having a lovable pet by your side! Have you found effective methods or tools for removing dog hair from your car? Share your experiences and tips with fellow Pearl City residents who love their pets.

Unlocking Easy Transportation: 6 Methods to Get Plywood Home Without a Truck

Update Your Guide to Transporting Plywood Without a Truck Transporting plywood doesn’t have to be a daunting task, especially if you didn’t plan on making a purchase that requires a pickup truck. For residents of Pearl City and other areas, carrying plywood home can be easily tackled with the right strategies. This guide explores some creative alternatives for bringing home plywood without the need for a heavy-duty vehicle. Understand Your Plywood Plywood generally comes in 4×8 sheets, with weights varying by thickness and type. For example, a ¼-inch thick sheet typically weighs between 20 to 25 pounds, while a heavier ¾-inch sheet can weigh anywhere from 45 to 90 pounds. Knowing what type and amount of plywood you need is the first step in planning its transportation. Smart Tips for Transporting Plywood Here are six effective methods to safely transport your plywood without a truck: 1. Cut It at the Store Many big box retailers will cut your plywood to your desired dimensions right on the spot. This can save you a lot of hassle and makes it easier to fit the pieces in smaller vehicles. However, be aware that most stores only perform single straight cuts, so if you need more complex cuts, consider visiting during low-traffic hours. 2. Utilize Roof Racks If you have roof racks, securely strap the plywood to the top of your vehicle. It’s advisable to bring a helper to lift the pieces onto the roof. Place two 2x4s beneath the plywood to act as support rails and use ratchet straps instead of regular ropes to ensure it stays secure. Always choose secondary roads to avoid high speeds that could lead to accidents. 3. Delivery Services: Cost vs. Convenience For those purchasing several sheets or other materials, consider delivery options. Local lumberyards often offer cheaper delivery rates than larger home centers. The charges can range from $75 to $125 through home centers, but locals might deliver for much less—this option is typically more convenient and saves time. 4. Rent a Trailer If your vehicle has a hitch, renting a trailer can be an excellent solution. Even compact cars may have towing capabilities. Always ensure to secure the plywood properly to prevent any movement during transportation. 5. Truck Rentals for Quick Transport Renting a truck from a nearby home center is another straightforward option. This is particularly effective if you’re moving multiple large items. However, be aware that you cannot reserve these trucks in advance, so it’s wise to go early—especially on weekends. 6. Opt for Smaller Sheets If your project allows for it, purchasing smaller sheets can be a practical choice that fits better in standard cars. Sizes such as 2×2 or 2×4 are easier to maneuver and transport. While these smaller sheets tend to be pricier per square foot, they can save you time and effort. Legal Considerations and Safety Tips It's crucial to secure your load properly to comply with local road safety regulations. Make sure that your plywood is tied down adequately and adheres to the extending-out laws, which may necessitate a warning flag if hanging out of your car. Conclusion: Empowering Your DIY Projects So, whether you’re working on a home improvement project or a DIY craft, transporting plywood without a truck is entirely possible with proper planning and resourcefulness. Don't let the absence of a truck hinder your creativity!

Terms of Service

Privacy Policy

Core Modal Title

Sorry, no results found

You Might Find These Articles Interesting

T
Please Check Your Email
We Will Be Following Up Shortly
*
*
*